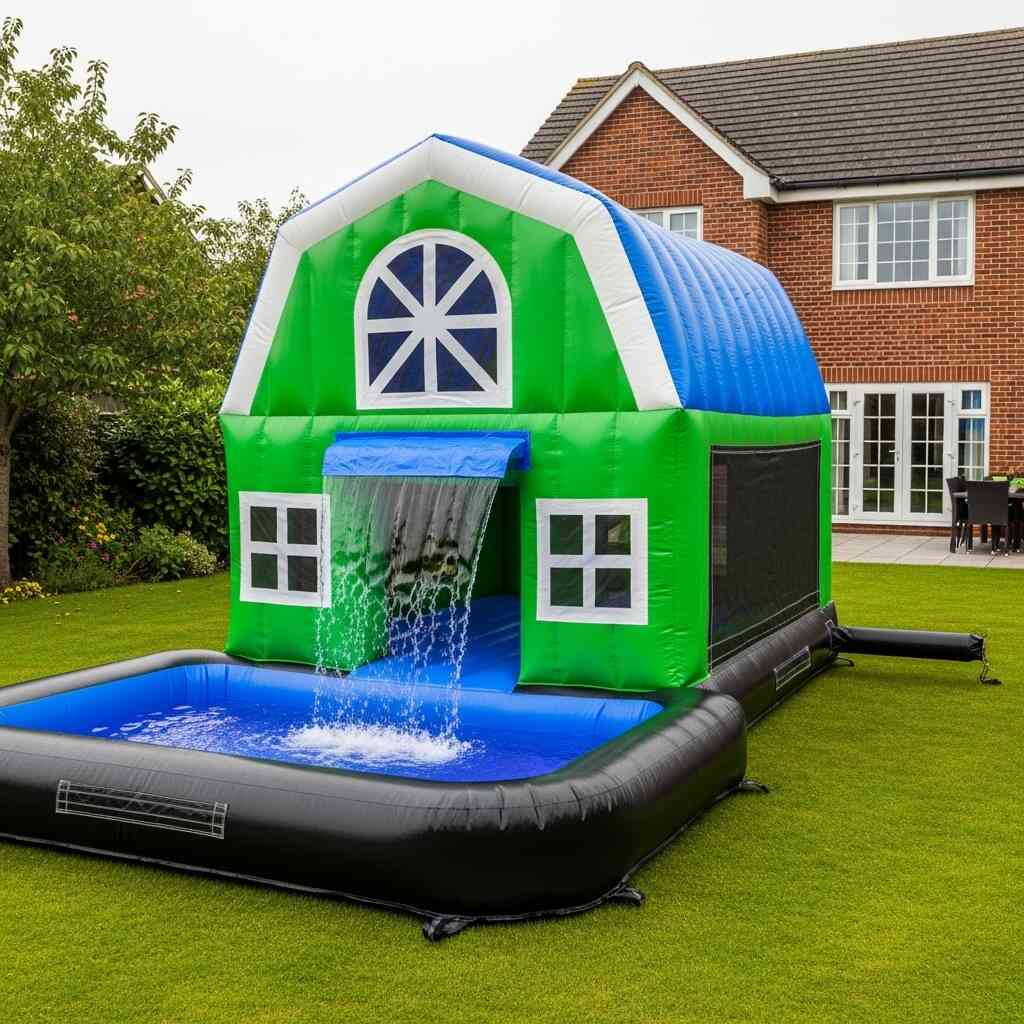
As the summer sun rises higher in the sky and temperatures begin to climb, families and friends look for ways to beat the heat while still enjoying time together. One increasingly popular option is the use of inflatable barn pools , which offer a unique blend of rustic charm and modern convenience. These backyard-friendly water features combine the nostalgic appeal of countryside living with the practicality of easy setup and takedown.
Unlike traditional above-ground or in-ground pools, inflatable barn pools do not require permanent installation, making them an ideal choice for seasonal use. Whether you’re looking to create a splash zone for kids, a relaxing dip for adults, or a centerpiece for outdoor gatherings, these structures provide a versatile solution that can be tailored to your space and needs.
This article will guide you through the comprehensive process of setting up inflatable barn pools for summer entertainment. We’ll explore everything from site selection and preparation to inflation, customization, safety considerations, and maintenance tips. By the end, you’ll have a clear understanding of how to transform your backyard into a summer oasis using this innovative and charming alternative to conventional pools.
Part 1: Understanding Inflatable Barn Pools
What Are Inflatable Barn Pools?
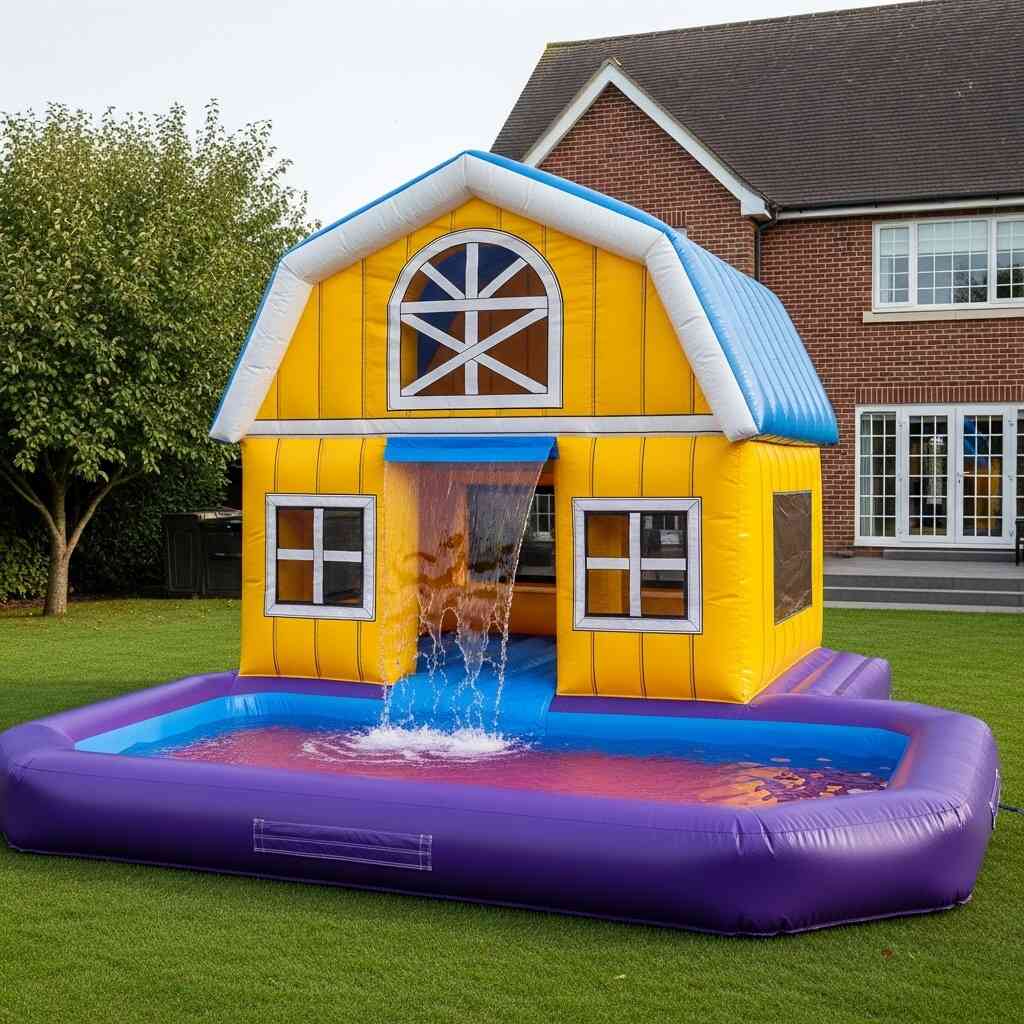
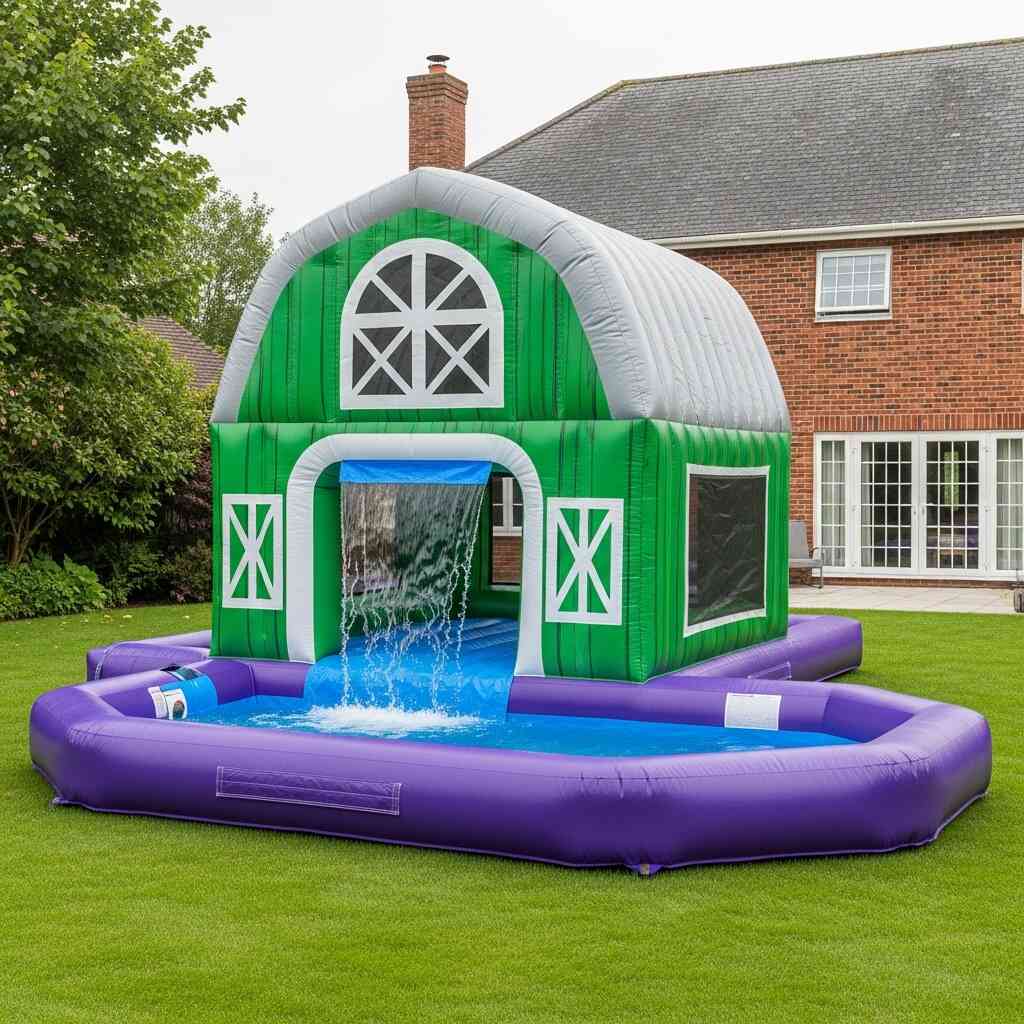
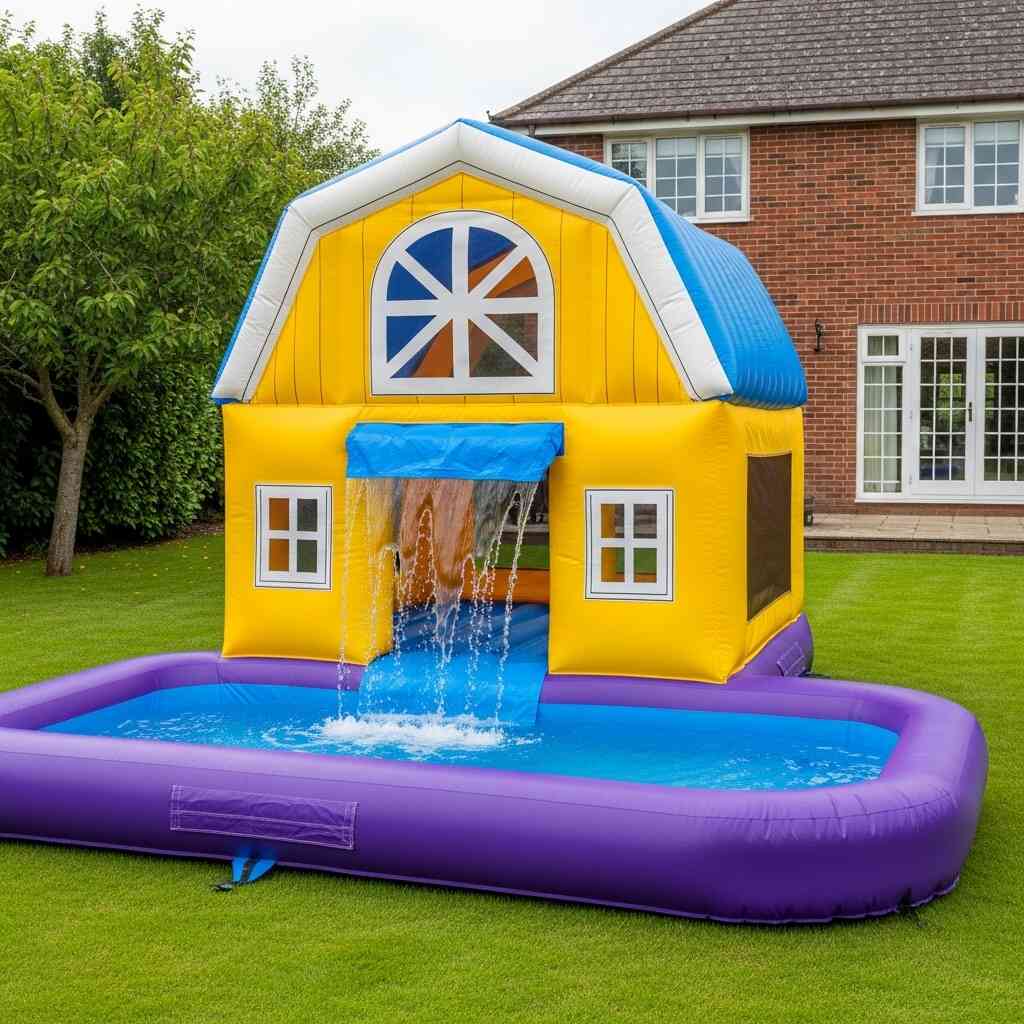
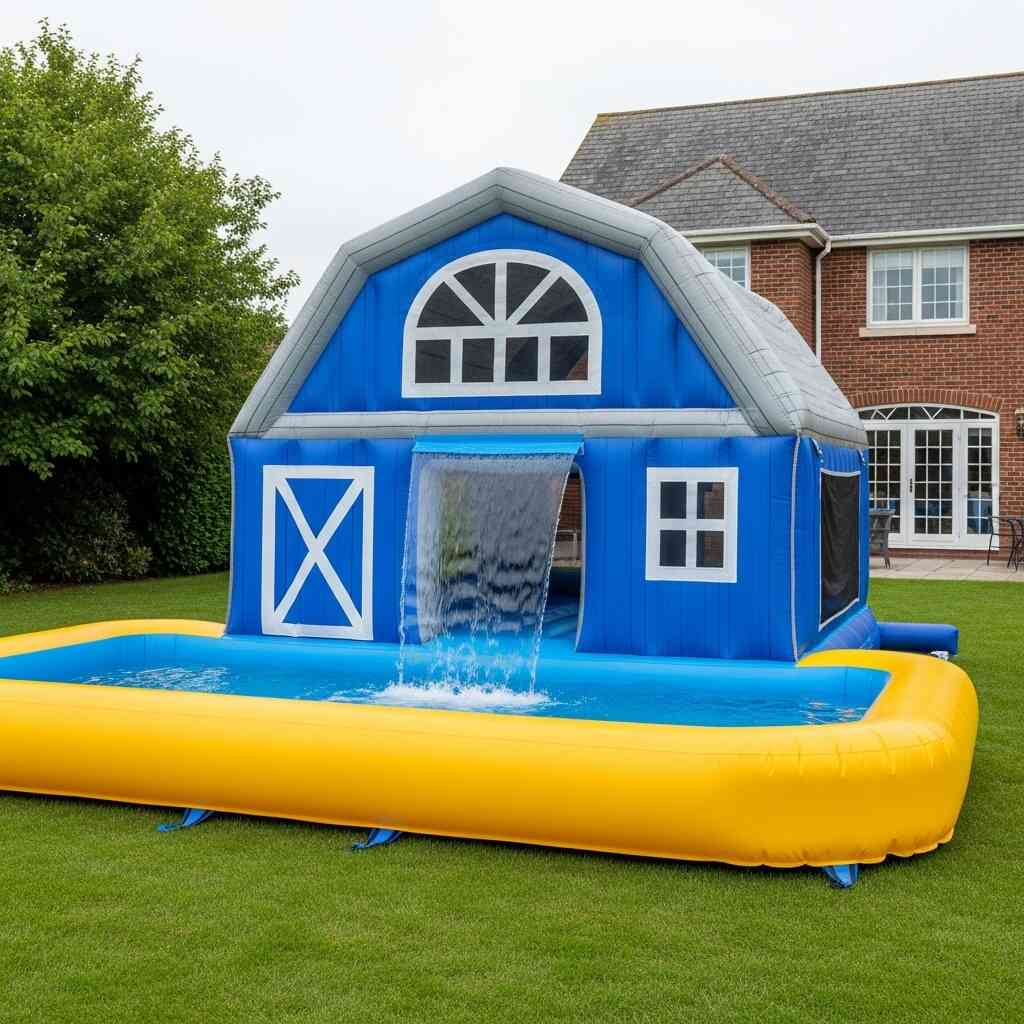
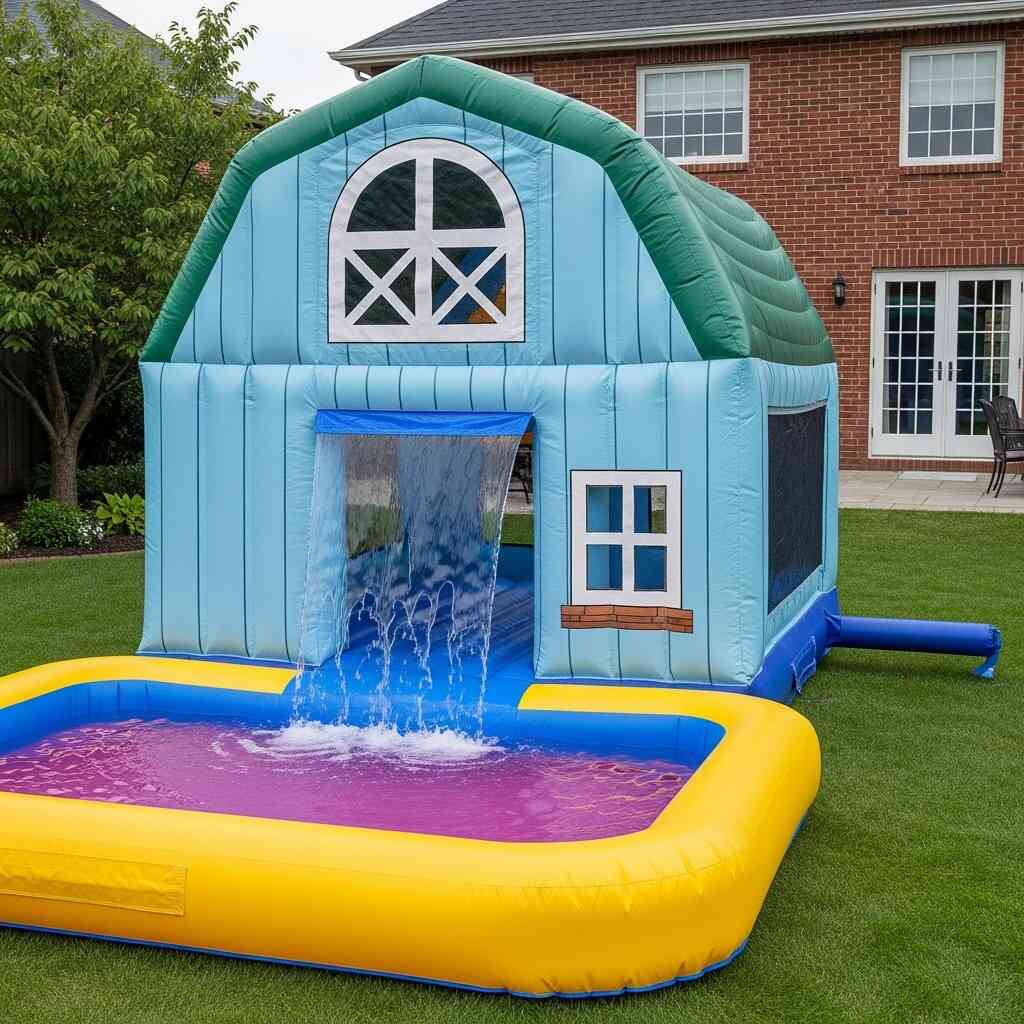
Inflatable barn pools are large, durable water-holding structures designed to resemble miniature barns. They typically feature vinyl or PVC construction and come in a variety of sizes and styles. The “barn” design often includes gabled roofs, wooden-style panels, and sometimes even faux windows or doors, giving them a whimsical, farmhouse aesthetic.
These pools are usually self-contained and rely on air chambers for structural support once inflated. Some models include built-in frames or metal supports for added stability, but most rely solely on the pressure of the air inside their walls to maintain shape and integrity.
Why Choose Inflatable Barn Pools?
The appeal of inflatable barn pools lies in their combination of functionality and visual appeal. Here are some key reasons why they’ve become a go-to option for summer recreation:
- Aesthetic Appeal : Their barn-like design blends well with rural or suburban landscapes, adding a decorative touch while serving a functional purpose.
- Ease of Setup : Unlike traditional pools, inflatable barn pools can be assembled in a matter of hours without professional help.
- Portability : Since they are inflatable and can be deflated, they are easy to store during off-seasons and moved if necessary.
- Cost-Effective : Without the need for excavation or complex installation, these pools represent a more affordable alternative.
- Versatility : Depending on size, they can accommodate both children and adults, offering a safe environment for swimming, playing, or lounging.
By choosing an inflatable barn pool, you’re opting for a temporary yet robust solution that enhances your outdoor space and creates lasting memories during the summer months.
Part 2: Preparing for Installation
Step 1: Choosing the Right Location
Selecting the appropriate location for your inflatable barn pool is crucial to ensuring both safety and enjoyment. Consider the following factors when deciding where to place your structure:
- Flat, Level Ground : Uneven surfaces can cause instability and uneven water distribution, leading to potential damage or collapse. Use a level or bubble level tool to check ground flatness.
- Drainage : Avoid low-lying areas where water might collect after rain. Good drainage helps prevent erosion and keeps the surrounding area dry and safe.
- Sun Exposure : While some sunlight is necessary for warmth, too much direct exposure can increase water temperature and promote algae growth. A partially shaded spot might be ideal.
- Proximity to Power Sources : If your pool includes a pump or filtration system, ensure it’s close enough to an electrical outlet (while keeping cords away from water).
- Accessibility : Make sure there’s enough space around the pool for people to move freely, especially important for younger swimmers who may need supervision.
Take time to walk around your yard and assess potential spots before finalizing your decision. Clear the area of rocks, sticks, and sharp objects that could puncture the pool lining.
Step 2: Gathering Necessary Tools and Materials
Before beginning assembly, make sure you have all the tools and materials needed. Most kits come with instructions and basic components, but here’s a list of what you might need:
- Lawn Mower or Rake : To clear grass and debris.
- Shovel or Trowel : For smoothing out the ground and removing obstacles.
- Tarp or Ground Cloth : Provides an extra layer of protection between the pool and the ground.
- Water Source : A garden hose for filling the pool.
- Air Pump or Blower : For inflating the structure (some models come with one).
- Level or Measuring Tape : To ensure even placement.
- Stakes or Sandbags (optional): For anchoring the pool in windy conditions.
- First Aid Kit : Always keep one nearby for safety purposes.
Having all materials ready before starting ensures a smooth and uninterrupted setup process.
Step 3: Preparing the Ground Surface
Once the location is chosen and cleared, prepare the surface thoroughly:
- Mow the Grass : Cut the grass short to reduce moisture and potential mold issues.
- Remove Debris : Pick up any twigs, stones, or sharp objects that could puncture the pool bottom.
- Smooth the Soil : Use a rake or shovel to flatten bumps and fill in holes.
- Lay Down a Tarp : This acts as a barrier against abrasion and provides cushioning. Ensure it extends beyond the base of the pool by at least a foot on each side.
Taking the time to properly prepare the ground will extend the life of your inflatable barn pool and enhance its performance throughout the season.
Part 3: Assembling Your Inflatable Barn Pool
Step 1: Unpacking and Inspecting the Components
Begin by unpacking the box or container holding your inflatable barn pool. Lay out all parts on a clean surface and inspect them for any signs of damage or missing pieces. Typical components include:
- Main Pool Structure
- Roof Panels or Covers
- Air Chambers or Frame Supports
- Inflation Valve
- Instruction Manual
- Accessories (e.g., ladders, filters, covers)
If anything appears damaged or missing, refer to the manufacturer’s instructions or contact customer service before proceeding.
Step 2: Laying Out the Pool
Carefully unfold the main body of the inflatable barn pool onto the prepared ground. Be gentle to avoid tearing the material. Align the structure according to your earlier measurements, ensuring it sits evenly on the tarp.
Check that all valves are closed and zippers or closures are secure. Some models may require partial inflation before full deployment—refer to the manual for specific guidance.
Step 3: Inflating the Structure
Using your air pump or blower, begin inflating the designated air chambers. Start with the base or outer walls first, then proceed to the roof or support beams if applicable. Follow these tips for successful inflation:
- Use the Correct Nozzle : Match the pump nozzle to the valve type to ensure a tight seal and efficient airflow.
- Inflate Gradually : Don’t rush the process; allow the material to expand evenly.
- Check for Twists or Bunching : Stop periodically to adjust the structure so it maintains its intended shape.
- Avoid Overinflation : Overfilling can strain seams and lead to leaks or ruptures. Inflate until firm but not rigid.
Once fully inflated, double-check that all sections are stable and that the barn shape is intact.
Step 4: Securing the Structure
Depending on your model and local weather conditions, you may need to anchor the pool to prevent movement or tipping:
- Stakes : Insert heavy-duty stakes through designated grommets or loops on the corners and sides of the pool.
- Sandbags or Water Bags : Place these along the edges for added weight and stability, especially in windy areas.
- Tie-Down Straps : Some kits include straps that connect to ground anchors for extra security.
Ensure all securing mechanisms are tight but not damaging the material.
Step 5: Installing Roof and Accessories
If your inflatable barn pool includes a removable roof or cover, now is the time to install it. Most roofs slide over the top frame or clip into place. Make sure it fits snugly and doesn’t flap in the wind.
Other accessories like ladders, filtration systems, or shade canopies should also be installed now. Follow the manufacturer’s guidelines for proper placement and connection.
Step 6: Filling the Pool with Water
Now comes the exciting part—filling your inflatable barn pool with water. Use a garden hose connected to a reliable water source. Keep the following in mind:
- Fill Slowly : Allow the structure to settle under the weight of the water. Monitor for any shifting or bulging.
- Check Water Level : Most manufacturers recommend filling to a certain line or height. Exceeding this can stress the seams.
- Add Stabilizers (if applicable): Some pools come with internal braces or support rings that help maintain shape under water pressure.
Once filled, let the pool sit for a few hours to ensure everything remains stable before allowing anyone to enter.
Part 4: Customizing and Enhancing Your Inflatable Barn Pool Area
Adding Comfort and Style
Transform your inflatable barn pool into a true backyard retreat by enhancing the surrounding area with comfort-focused additions:
- Decking or Pavers : Install a small deck or lay down patio stones around the pool to create a defined, non-slip entry area.
- Outdoor Furniture : Add lounge chairs, benches, or picnic tables nearby for relaxation and socializing.
- Umbrellas or Shade Sails : Provide additional sun protection, especially during midday hours.
- Lighting : String lights or solar-powered lanterns add ambiance and extend usability into the evening.
Choose decor that complements the barn aesthetic—think rustic wood finishes, galvanized metal accents, and earthy tones.
Creating Play Zones
For families with children, consider creating designated play zones around the pool:
- Splash Toys : Floating animals, water guns, or sprinklers can keep kids entertained.
- Floating Mats or Rafts : Encourage lounging and games in the water.
- Pool Noodles and Balls : Classic pool toys that are always a hit.
- Mini Slides or Climbing Structures : Some inflatable barn pools are compatible with attached slides or climbing walls—check compatibility before purchasing.
Always supervise young children closely and ensure all toys are age-appropriate and safe.
Incorporating Storage Solutions
To keep your pool area tidy and organized, integrate storage options that match the theme:
- Bench Boxes : Store towels, sunscreen, and toys in weatherproof containers.
- Wall Hooks or Shelves : Attach hooks or shelves to the barn walls for hanging items like goggles or floaties.
- Caddies or Carts : Use rolling carts to transport drinks, snacks, and supplies to and from the pool.
Smart storage solutions help maintain a clutter-free environment and streamline daily use.
Part 5: Safety and Maintenance Tips
Ensuring Safe Usage
Safety should always be a priority when using any type of pool, especially those used by children. Implement the following practices:
- Supervision : Never leave children unattended near the pool, even if they know how to swim.
- Fencing or Barriers : If your inflatable barn pool is large and deep, consider surrounding it with a temporary fence or gate to prevent unsupervised access.
- Swim Rules : Establish clear rules such as no running, no diving, and staying within designated depth zones.
- Life Jackets : Provide life jackets for non-swimmers or inexperienced individuals, particularly in deeper models.
- First Aid Access : Keep a waterproof first aid kit and emergency contact information readily available.
Educate all users about pool safety and reinforce good habits consistently.
Routine Maintenance
Regular upkeep is essential for prolonging the lifespan of your inflatable barn pool and ensuring optimal performance:
- Water Testing and Treatment : If your pool includes a filter system, test the water regularly for pH balance and chlorine levels. Use appropriate chemicals to keep the water clean and safe.
- Cleaning the Interior : Skim leaves and debris regularly. Wipe down the inner walls with a mild detergent and soft brush to prevent buildup.
- Checking for Leaks : Periodically inspect seams, valves, and connections for signs of wear or leakage. Use patch kits provided by the manufacturer to repair minor damages.
- Pump Maintenance : Clean or replace air filters on blowers or pumps as needed. Ensure all moving parts function smoothly.
Consistent maintenance not only preserves the condition of your pool but also contributes to a healthier and more enjoyable experience.
Winterization and Storage
At the end of the season, follow these steps to properly winterize and store your inflatable barn pool:
- Drain the Water Completely : Use a submersible pump or gravity drain to remove all water.
- Dry Thoroughly : Leave the pool open in a sunny, ventilated area to air dry completely before packing.
- Inspect for Damage : Repair any tears or leaks before storing.
- Deflate Carefully : Release air slowly through the valve, folding or rolling the structure neatly.
- Store Indoors : Keep the deflated pool in a cool, dry place away from pests and extreme temperatures.
Proper storage protects your investment and ensures the pool is ready for use next summer.
Conclusion: Enjoying a Summer Full of Memories with Inflatable Barn Pools
Setting up inflatable barn pools for summer entertainment is more than just assembling a recreational structure—it’s about creating a space where laughter echoes, friendships deepen, and childhood memories are made. With thoughtful planning, careful installation, and regular maintenance, your inflatable barn pool can become the heart of your backyard oasis.
From selecting the perfect location to customizing the space with comforts and safety measures, every step plays a role in transforming your outdoor area into a fun-filled retreat. Whether you’re hosting family barbecues, teaching kids to swim, or simply soaking up the sun with a book, an inflatable barn pool offers endless possibilities for joy and connection.
By embracing the simplicity and charm of these unique pools, you open the door to a summer season rich in adventure, relaxation, and shared moments. So take the plunge, set up your inflatable barn pool, and get ready to enjoy the best that summer has to offer.